
INTRODUCTION
RAID 10, also known as RAID 1+0, is a popular and high-performance RAID (Redundant Array of Independent Disks) configuration that combines elements of both RAID 1 and RAID 0. It offers a balance between data redundancy and improved performance, making it well-suited for applications that require high-speed data access along with data protection.
RAID 10 requires a minimum of four disks. Disks are divided into pairs, with each pair forming a RAID 1 array for redundancy, and then the pairs are striped for improved performance.
OVERVIEW
Here’s an overview of RAID 10:
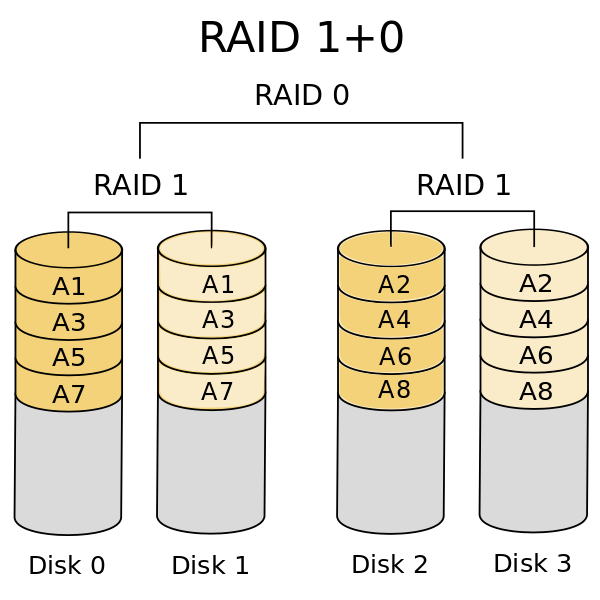
- Redundancy and Mirroring (RAID 1): In RAID 10, data is mirrored, which means that identical copies of data are stored on separate pairs of disks. If one disk fails, the mirrored copy on another disk ensures data integrity and availability. This redundancy provides a strong level of data protection, as the system can continue operating even if a disk fails.
- Striping (RAID 0): RAID 10 enhances performance through striping, a technique where data is divided into blocks and written across multiple disks simultaneously. This striping improves read and write speeds, as data can be read or written from/to multiple disks concurrently. Combining mirroring with striping gives RAID 10 its high performance characteristics.
- Minimum Disk Requirement: RAID 10 requires a minimum of four disks. Disks are divided into pairs, with each pair forming a RAID 1 array for redundancy, and then the pairs are striped for improved performance.
- Performance and Redundancy Trade-off: RAID 10 offers an excellent balance between performance and redundancy. It provides better fault tolerance compared to RAID 0 or RAID 5 due to the mirroring aspect, and it can sustain multiple drive failures as long as they don’t impact both sides of the mirror in the same pair.
- Use Cases: RAID 10 is often used in scenarios where both high-speed data access and data protection are essential. It is suitable for database servers, file servers, virtualization environments, and other applications that require fast I/O operations and minimal downtime.
- Management and Rebuild Times: RAID 10 has relatively fast rebuild times compared to other RAID levels like RAID 5 or RAID 6, as rebuilding only involves copying data from a mirror. However, managing RAID 10 arrays can be more complex due to the presence of multiple mirrors.
- Cost: RAID 10 requires a higher number of disks compared to other RAID levels like RAID 5 or RAID 6, which can result in higher hardware costs. However, the benefits in terms of performance and data protection may outweigh the cost considerations for certain applications.
TEST CASE
In the test case section, we will simulate a two-disk failure in the Proxmox hypervisor. Proxmox can use the ZFS package to build disks into a RAID array.
First, we need to build a VM installed with Proxmox VE to simulate the scenario.
- Hardware Preparation
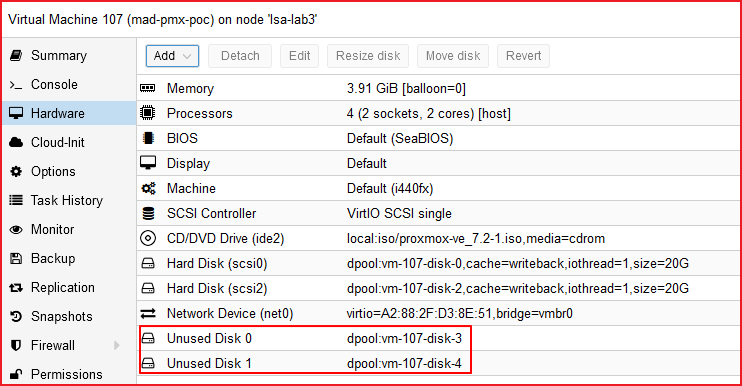
Please prepare a VM with 4 disks attached.

- Installation
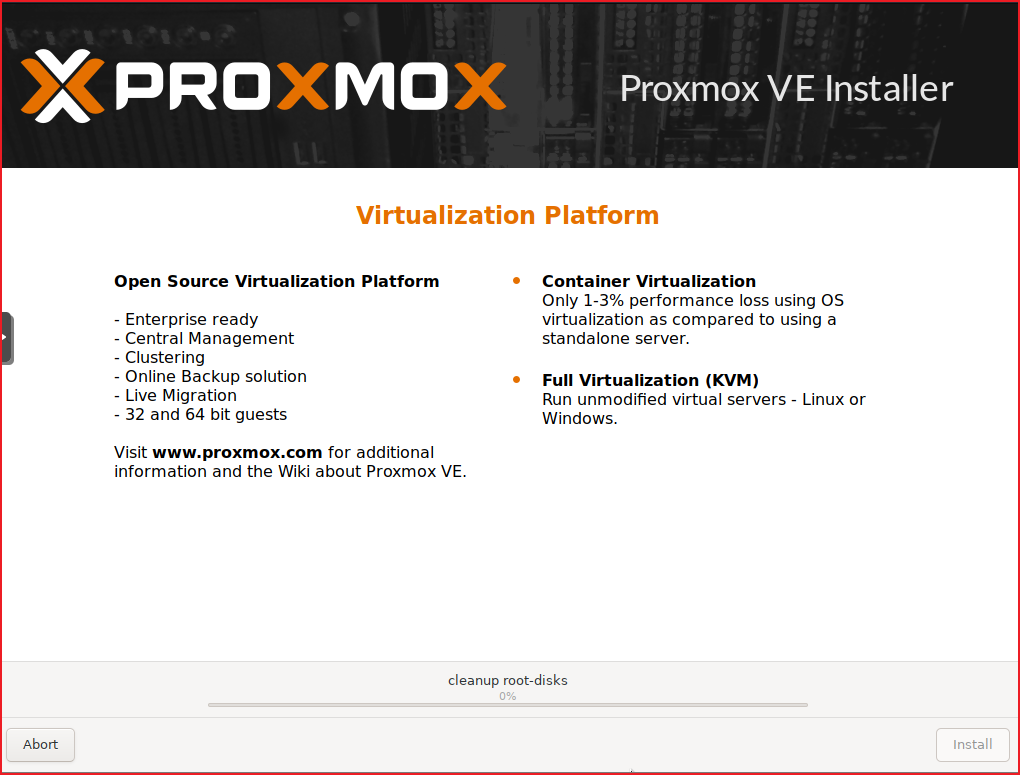
Install the Proxmox VE with ZFS RAID10 configured

Summary

Installation in progress
- Failed disk simulation
Brief steps to perform a failed disk simulation:
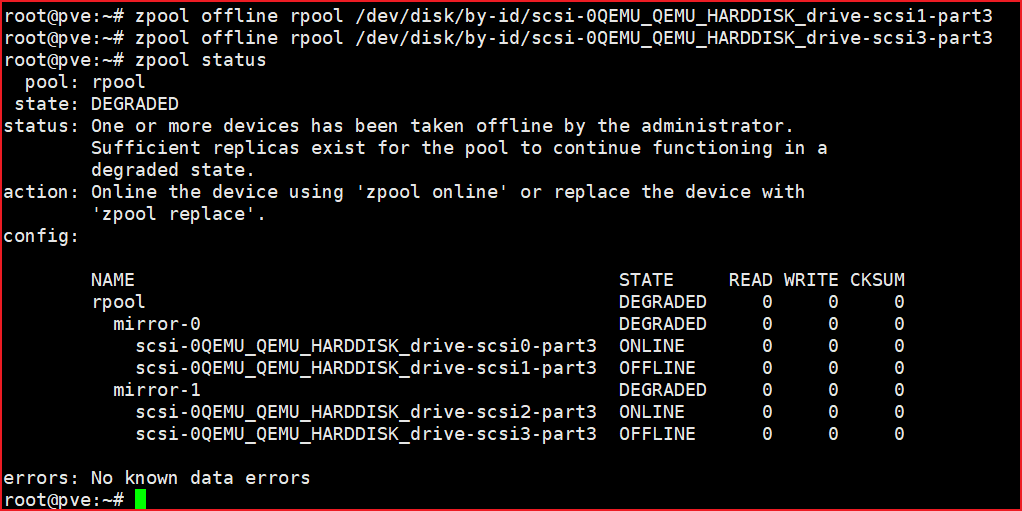
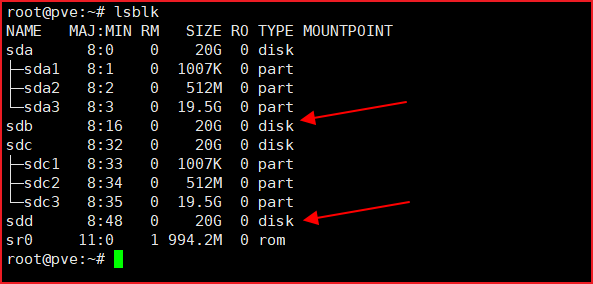
- Make two disks on the different arrays offline
- Detach the two offline disks, then swap them with the newly available disks
- Perform the partition replication from the adjacent disk
- Replace the offline disks sequentially, with the ZFS command
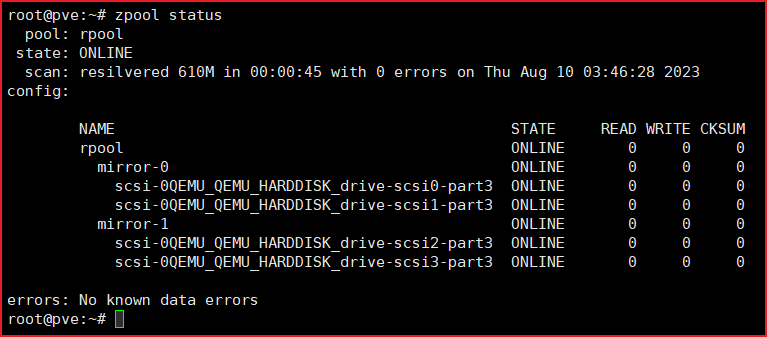
- Wait until the resilvering progress is finished
- Install grub on the newly attached disks
Make two disks on the different arrays offline
Detach the two offline disks
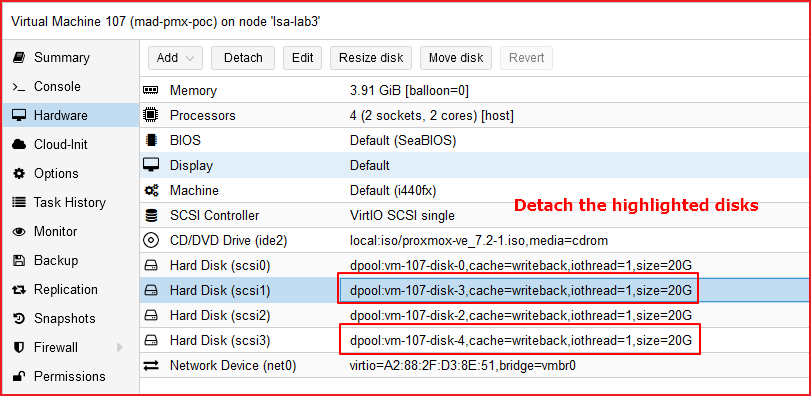
Swap them with the newly available disks
Perform the partition replication from the adjacent disk
sgdisk -R /dev/new_first_disk /dev/sda (sgdisk -R /dev/newdisk /dev/olddisk)
sgdisk -G /dev/new_first_disk (sgdisk -G /dev/new disk)
Replace the offline disks sequentially, with the ZFS command
example command:
zpool replace rpool /dev/sdb2 /dev/sdb2 (replace the disk)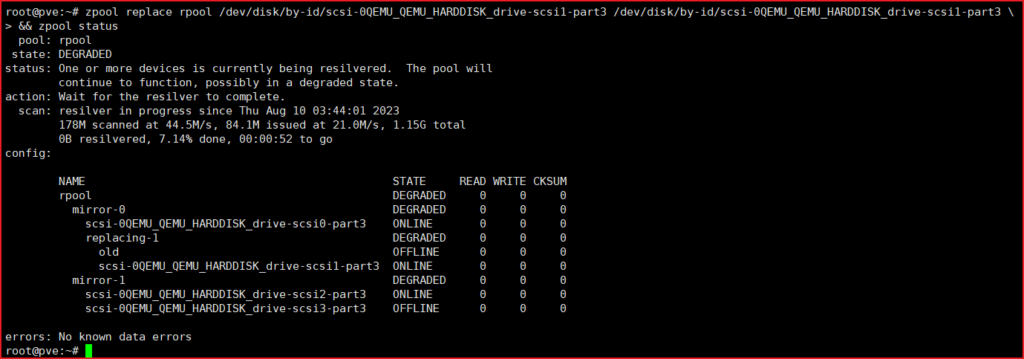

Install grub on the newly attached disks
/usr/sbin/grub-install.real /dev/sdX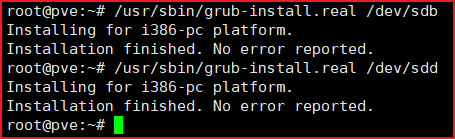
CONCLUSION
Throughout the article, we have examined the capability of ZFS on the two failed disk simulations in RAID10.
As long as the failed disk is not in the same array of the RAID, we can perform a restoration process to the mentioned failed disk.
Leave a Reply