
SUSE Rancher has a nice application that we can use for Continuous Delivery in Kubernetes.
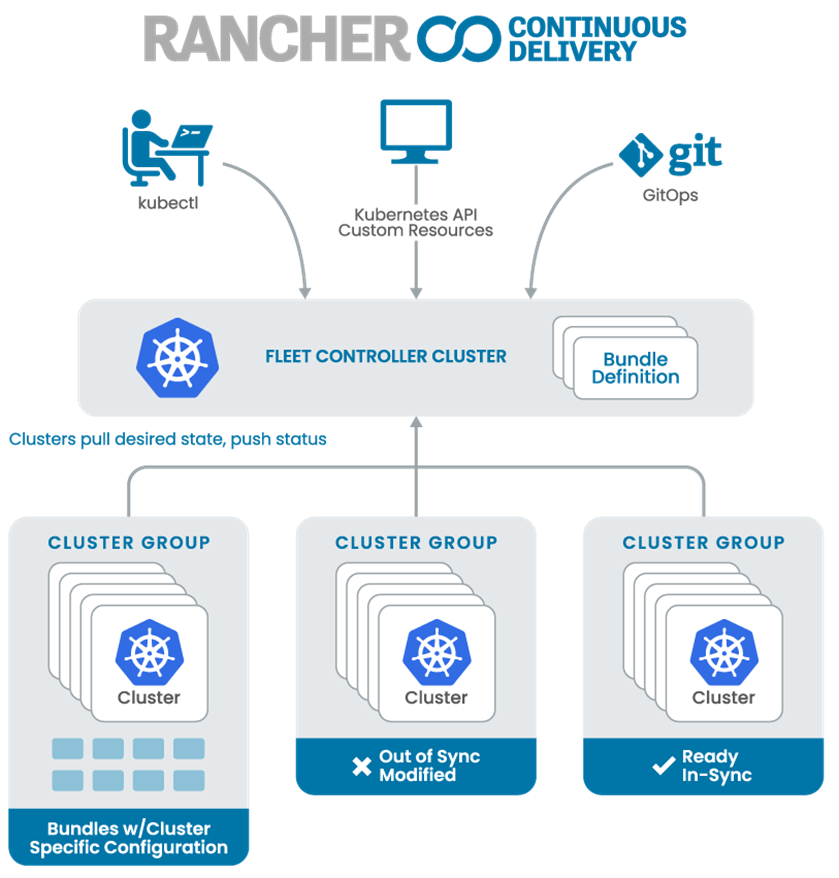
From version 2.5, Rancher has bundled with Fleet for GitOps like CI/CD Application
GitOps is a model for designing that takes DevOps best practices for application development like version control, collaboration, CI/CD then applies them to infrastructure automation.
Fleets implement GitOps at a scale that can manage and deploy applications to the cluster Kubernetes.
Fleet is small enough that can be used by developers to run this because Fleet is bundled with Rancher.
In this tutorial, make sure you have installed rancher using our previous article
Then create namespace “myapp” in Kubernetes because we will use this namespace for our deployment
Create a Github repo:
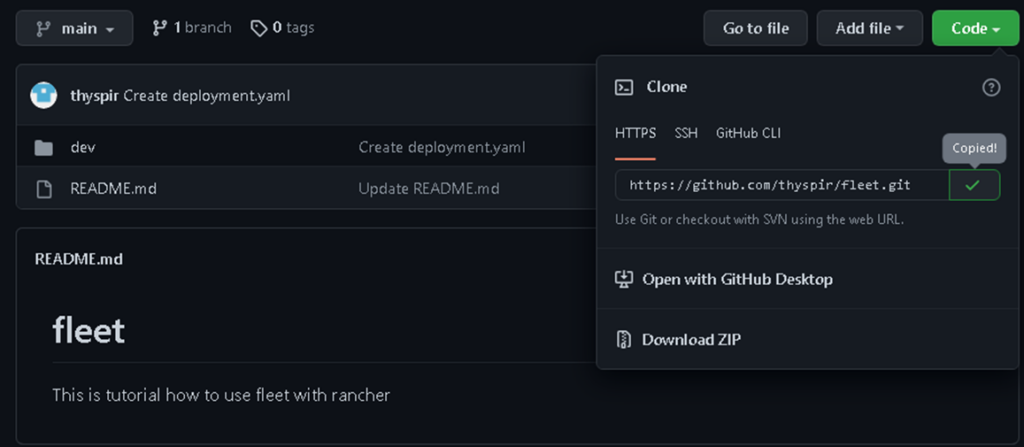
Before using Fleet, we need a git repo for our deployment. Here, we will use GitHub as a GitHub repo and CI pipeline.
In a GitHub, we created a dev folder that contains three yaml files:
https://github.com/thyspir/fleet
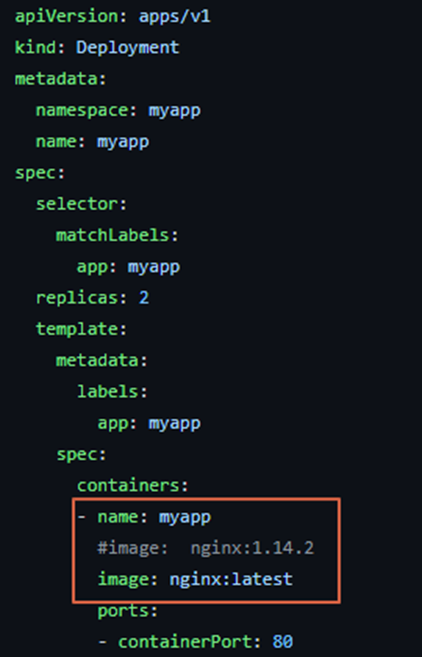
Deployment file: We will deploy a simple webserver using nginx. Please focus on line namespace and image.
In namespace, we will use namespace myapp . And for the container image, we will use the latest nginx and nginx 1.14.2.
deployment.yaml

apiVersion: apps/v1
kind: Deployment
metadata:
  namespace: myapp
  name: myapp
spec:
  selector:
    matchLabels:
      app: myapp
  replicas: 2
  template:
    metadata:
      labels:
        app: myapp
    spec:
      containers:
      - name: myapp
        image:  nginx:1.14.2
        #image: nginx:latest
        ports:
        - containerPort: 80
Service file: After deploying the pod, we need to create a service for the deployment. We will use port 80 for the service.
service.yaml

apiVersion: v1
kind: Service
metadata:
  namespace: myapp
  name: myapp-service
spec:
  selector:
    app: myapp
  ports:
  - port: 80
    protocol: TCP
    targetPort: 80
Ingress File: After deployment and service are Ready, the last step we need to create Ingress. We use myapp.settingserver.com as the hostname that we can browse via browser.
ingress.yaml

apiVersion: networking.k8s.io/v1
kind: Ingress
metadata:
  name: myapp.settingserver.com
  namespace: myapp
spec:
  rules:
  - host: myapp.settingserver.com
    http:
      paths:
      - path: /
        pathType: ImplementationSpecific
        backend:
          service:
            name: myapp-service
            port:
              number: 80
Fleet
After configuring the GitHub repo, next we will configure Fleet as Continuous Delivery tools.
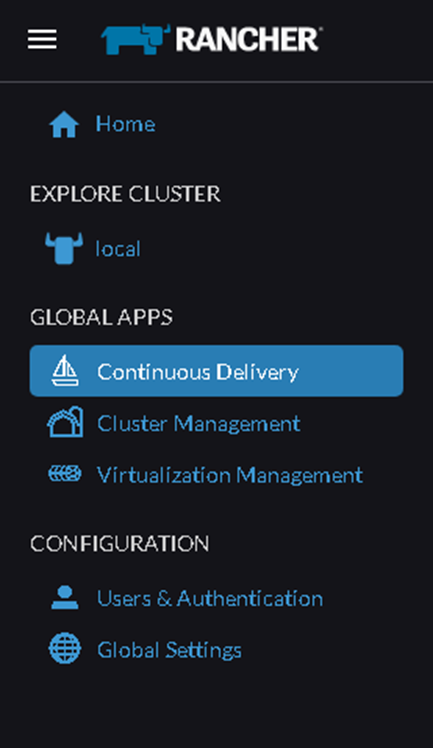
Login to your rancher dashboard and select the Continuous Delivery tab.
Before we create a Git Repos. We need to copy our github repo address:
https://github.com/thyspir/fleet.git
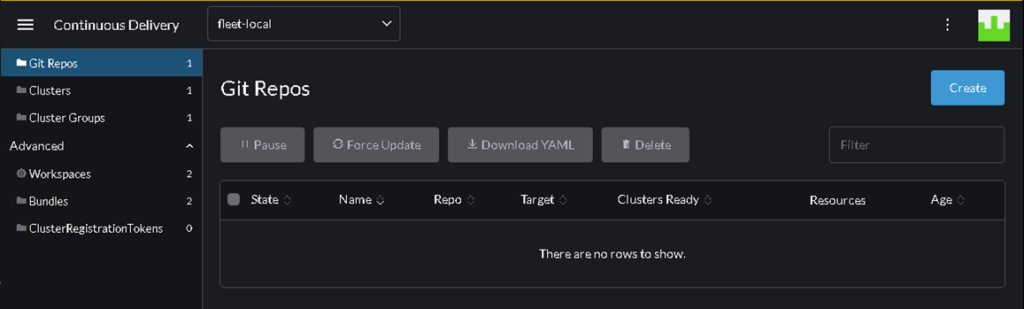
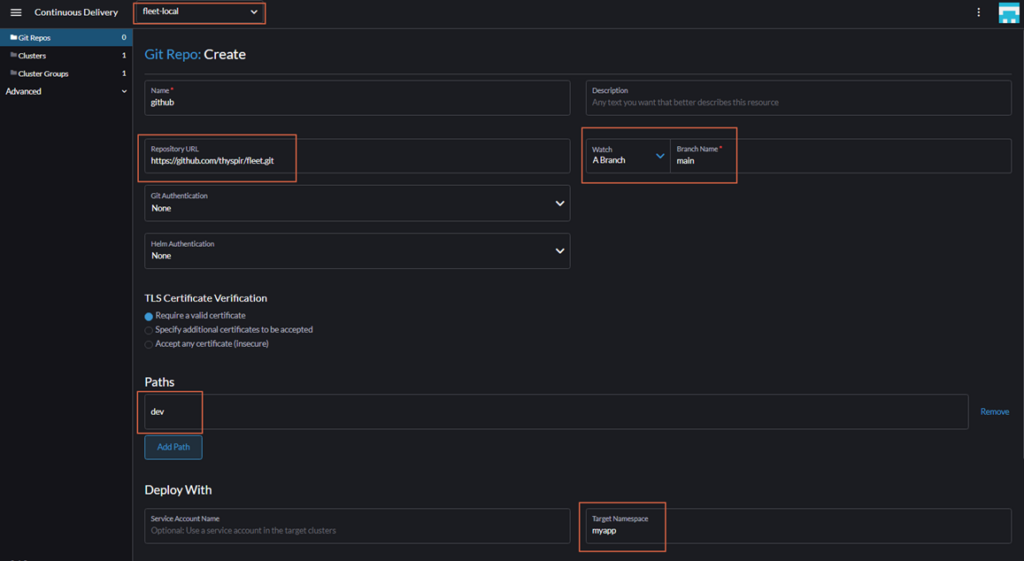
Choose Git Repos then click the Create button
Fill the field as follow:

Please wait for a while until Fleet deploys the application automatically. If the deployment is completed, you will see Cluster Ready as follow:

Click Name github to see the detailed deployment as follow:

We also can verify the deployment using the command line:
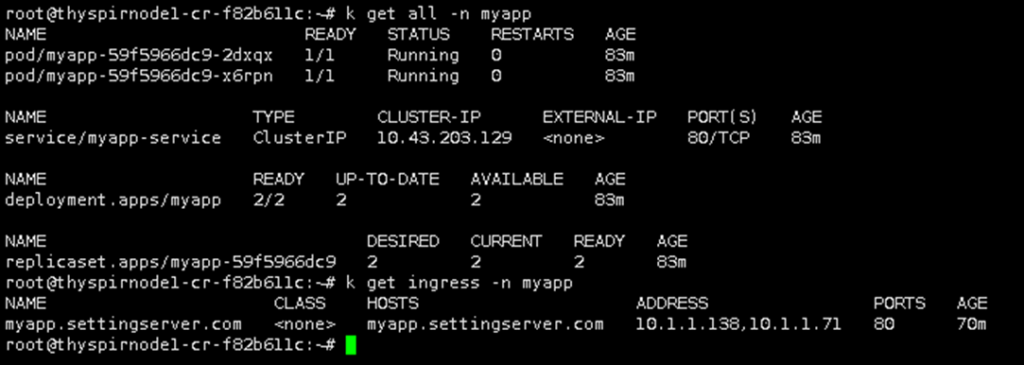
From the above command, we can see deployment, service, and ingress have been configured.
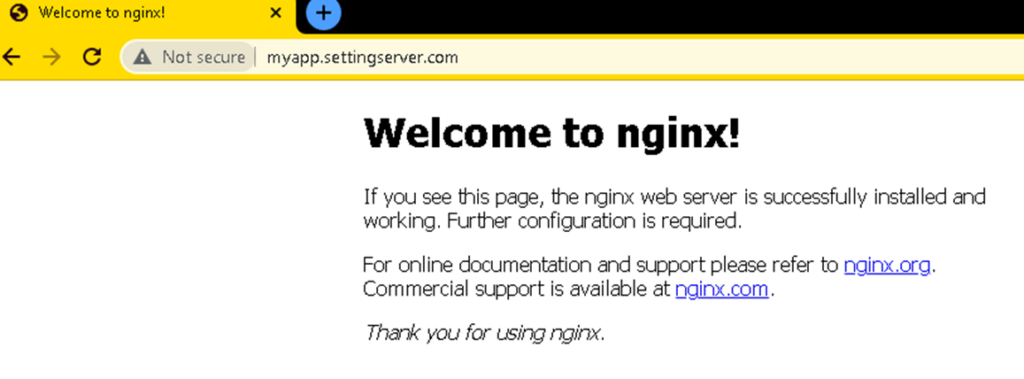
Now, open your browser and user local resolver to verify our webserver.
Remember, in our deployment we use nginx 1.14.2. If we browse myapp.settingserver.com, we can see a welcome page from nginx with a white page.
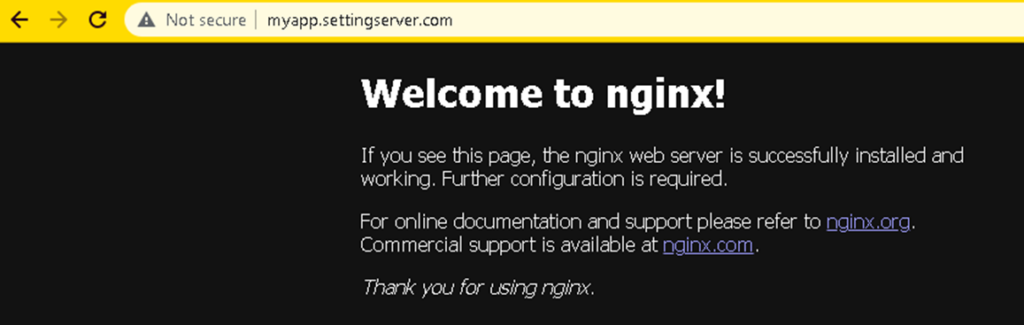
Now change the deployment using the latest nginx image as follow to verify the automation from Fleet:
After waiting for a while, Fleet will make changes according to GitHub repo.

Now you can refresh the browser again after Cluster is Ready.
You will see the welcome page of nginx with a dark page. It means that our deployment is using the latest nginx.

Leave a Reply